Categories
×
Product Line
Downloads
Company
Quote Request
Links
Photo Gallery
Beginners Guide to Motors
DC vs AC Golf Carts
Tech Support
Dealer
Dealer Application
Monday - Friday
8 AM - 4 PM EST

315-701-0635
Golf Cart Battery Wires

Click to View Larger
Made in the U.S.A.
Golf Car Wire Kits
golf cart battery wires | golf cart cable | golf cart battery cable | golf cart wires | golf car cable | golf cart cables | golf cart cable | golf cart battery wire | golf car cablesgolf cart battery wires | golf cart cable | golf cart battery cable | golf cart wires | golf car cable | golf cart cables | golf cart cable | golf cart battery wire | golf car cables
Part # | DescriptionQTYPrice 
Series
Club Car 48 Volt - 1995 (0-5K)$ 180
Club Car 48 Volt - 1996 and Later$ 180
EZ-GO 36 Volt - 1996 and Later$ 169
Regen
Club Car 48 Volt - (Precedent) 4x12V Batteries$ 169
Club Car 48 Volt - IQ/Precedent (IQ) 6x8V Batteries$ 169
EZ-GO 36 Volt - DCS$ 169
EZ-GO 36 Volt - PDS$ 169
EZ-GO 48 Volt - Converted (PDS)$ 169
EZ-GO 48 Volt - Factory (TXT-48V)$ 169
Yamaha 48 Volt - G19$ 169
Yamaha 48 Volt - G22$ 169
Yamaha Drive - G29$ 180
Unsure if you have a Series or Regen type vehicle?
Click Here

Unsure of the model or year of the vehicle?
Click Here
Questions ??
Unsure if you need heavy duty golf cart cables, call D&D Motor Systems 315-701-0635 or go to our

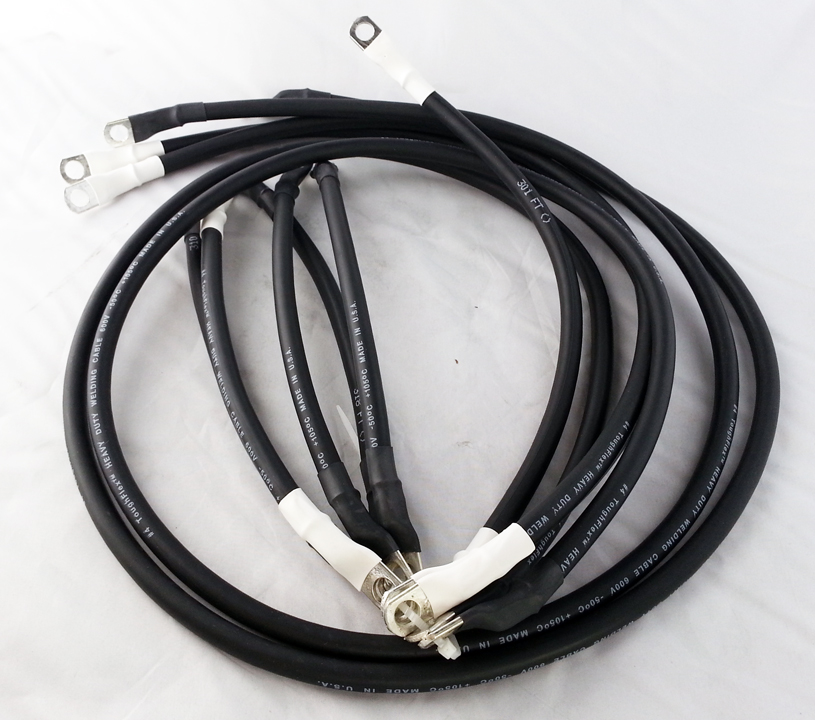
Choose a Motor Tool

All 4 AWG golf cart wire kits include the following:
— 420 strands of 30 guage (AWG) 100% copper is each golf cart cable
— Each golf cart cable is crimped, then soldered and shrink wrapped.
— Each terminal has color coded shrink wrap
— Terminals are made from solid copper and then tin coated for superior corrosion resistence
— 600 Volt capacity golf cart cable
— Very flexible and easy to install
— Easily readable wiring diagrams and packing list are included

D&D Motor Systems stocks a complete line of golf cart cables as listed below. Replacing a golf cart wire kit allows the golf car cables to carry more current (amps) thus enhancing performance. The stock vehicles come equipped with a 6 AWG golf cart wire kit, which may be fine for the basic golf course application. However, our upgraded high performance 4 AWG golf cart cables reduces the resistence caused by the golf carts higher current draw, which is caused by doing any sort of performance upgrades. Often golf cart cables can become blistered or completely melted in more extreme heavy duty applications. The most common cause for melting your golf cart cables, is not ensuring that the terminal connectors on the golf cart cables are tight. A loose connection with your golf cart cables will cause the current to encounter resistence, causing heat to build up and then melting your golf cart cables.

EZ-GO: Series 1996 and Up - Pictured Below
(All other golf cart cables are similar except lengths and quantities)
golf cart cables | golf car cables | golf car cable


EZ-GO: DCS and PDS - Pictured Below
(All other golf cart cables are similar except lengths and quantities)
golf cart cables | golf car cables | golf car cable


Club Car: IQ - Pictured Below
(All other golf cart cables are similar except lengths and quantities)
golf cart cables | golf car cables | golf car cable

Helpful Hints About Golf Cart Cables

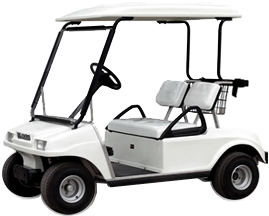
A) How to Wire a Golf Cart Battery
Electric golf carts are normally run by a bank of six batteries, depending on what model car you have purchased. The batteries are designed to provide a sustained charge to support propulsion of the cart over the duration of a playing day. Because the batteries are installed in a battery bank, their wiring differs from an automobile. A common task for golf cart owners is having to wire golf cart batteries when replacing them or removing for cleaning.
1. Open the battery compartment of your golf cart by lifting the seat out of the cart. Golf cart battery banks are normally located beneath the seat of the cart.
2. Remove the black negative cable from the first battery in the bank followed by the subsequent positive wire. You will do this for each battery in the bank in the same order moving from forward to rear in the battery bank.
3. Lift the batteries that require removal from the battery bank. Some battery banks are designed to hold each battery in place with a battery clip that will require a basic wrench to remove the securing nut and washer from the bracket.
4. Place the new batteries into the bank in the same position the battery that you removed was sitting. Re-secure the securing brackets for each new battery.
5. Reconnect the battery cables to the batteries in the bank. The main positive lead for the battery bank coming from the frame of the cart will connect to the positive terminal of the first battery in the bank. Then, connect a cable from the negative terminal of the first battery to the positive terminal of the subsequent battery in the bank. Continue connecting the negative terminal to the next positive terminal until all batteries are connected. The last battery in the bank will have a connection from its negative terminal to that of the frame or golf cart controls.
6. Connect the reverse positive cable to any of the positive terminals on the battery bank. This will be the extra positive cable that you disconnected when removing the batteries. This is the cable that powers the engine when the cart moves in reverse.

B) Additional videos showing EZ-GO TXT 4 gauge cable replacement.